 |
| I call it the Scheltema Neck Contour Jig v3.0. |
 |
| The resulting contour is so smooth, I will only need to sand from 150 grit to 220 to finish. |

|
| I call it the Scheltema Neck Contour Jig v3.0. |
|
| The resulting contour is so smooth, I will only need to sand from 150 grit to 220 to finish. |
 |
| It took me a couple of years to perfect my technique, but the results were with the effort. |
 |
| I know I am finished buffing when I can clearly see the reflection of my lamp without any scratches. |
 |
| I used my ghetto winder to fill the bobbins with 9,400 turns of 42 AWG poly nylon insulated wire. Each coil showed a DC resistance of 7.0 Ohms on my meter. That's a bit hotter than the norm for single coils, but the thick wire should produce wide ranging tone. |
 |
| To magnetize the Alnico V slugs, I use a vice with four neodymium magnets (two on each jaw, with north polarity on one jaw and south on the other). I slide the pickup into the field and quickly pull it out. The result is a fully charged row of slugs. However, for the best tone, the magnetic field needs to be weakened (degaussed) slightly. To do this, I place a 1-1/2" thick block of Maple against one set of neos and slide the pickup between the block and the other set. To check my efforts, I use a homemade gauss meter to test the strength of each slug before and after degaussing. Of course I won't know for sure how they'll sound until installation is complete. |
 |
| The last step before installation is to pot them for ten minutes in a 150° bath of paraffin and bees wax. This will reduce microphonic feedback, especially with regards to squeal. |
 |
| Today I made a set of single coil bobbins. Black fiber flatwork with staggered poles and brass eyelets. Tomorrow, I'll try to wind 'em fat with 42 AWG wire. |
 |
| This double cutaway features a hand rubbed tung oil finish |
 |
| This single cutaway features red dye and a water-based acrylic lacquer finish |
 |
| The necks for both of these guitar projects are finished with hand rubbed tung oil |

 |
| A pair of Highline Envirocaster necks near completion. At this stage, I have wiped them down with natural stain, which helps me to see any potential flaws. None were seen, so now I can proceed with adding the headstock decals. Then, I can shoot the water-based lacquer. |
 |
| I drilled out the surface of the knot and tried to fill it in. You can't feel it, but you can definitely see it. |
 |
| This is the new neck. To get to this point from a flamed Maple blank took about 3 hours. All I have left to do is attach the fretboard and do the final sanding and shaping. |
 |
| To drill the jack hole, I start by using a 7/8" Forstner bit and drill about 1/8" into the side of the body. |
 |
| Next, I drill out the wood with a regular 1/2" bit to make it easier for the Forstner bit to drill into the control cavity. |
 |
| To run the neck pickup's wires through the bridge pickup cavity and into the control cavity, I drill a 1/4" hole with an 18" long bit from the neck cavity all the way into the bridge pickup's cavity. |
 |
| Finally, I drill another 1/4" hole with the same long bit from the bridge pickup's cavity down into the control cavity. |
 |
| To make the slot for the 5-way lever switch, I used a 1/8" straight cut bit in my router. |
 |
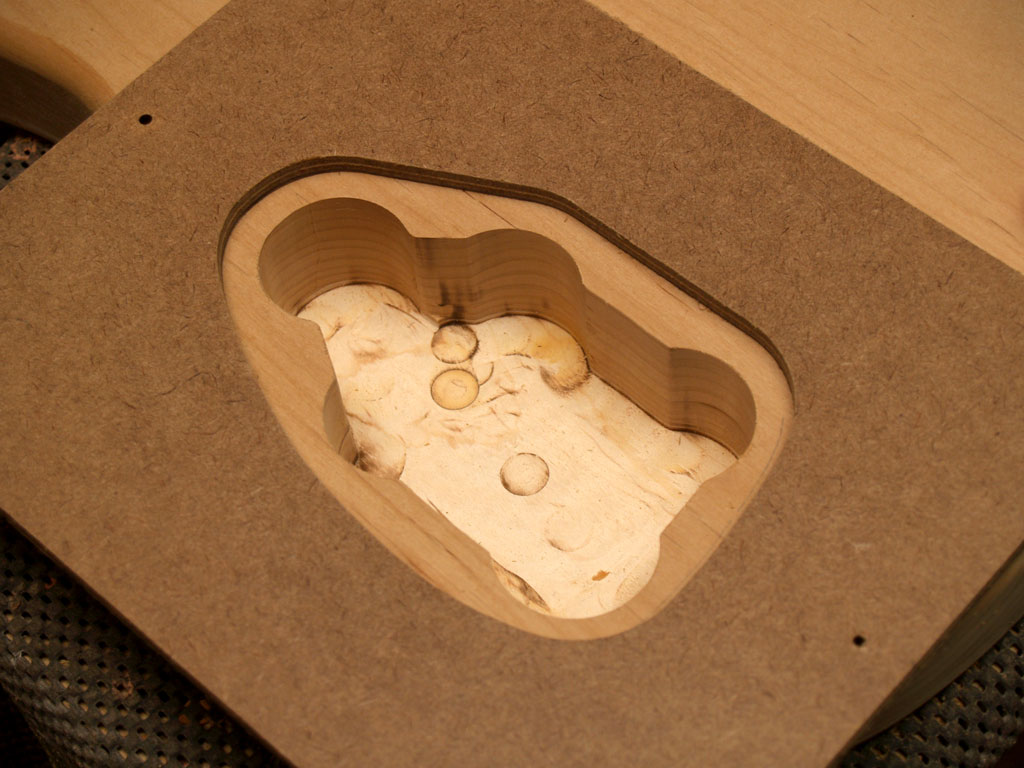
| I use a template in conjunction with a 1/2" diameter, 1" long pattern trimming router bit to rout the pocket. The depth is within a 1/4" of the front of the guitar. |
 |
| This is the template I use to make recessed cover shelf. |
 |
| To rout the recessed cover shelf, I use a bushing guide with a 3/8" straight bit. |
 |
| The router in action as I cut the recess for the cover. The depth is about 1/8" below the back surface. |
 |
| All that's left to do is drill the holes for the switch and pots and make the cover. |